Nexus User Guide
×
Menu
Index

Work Order Ribbon

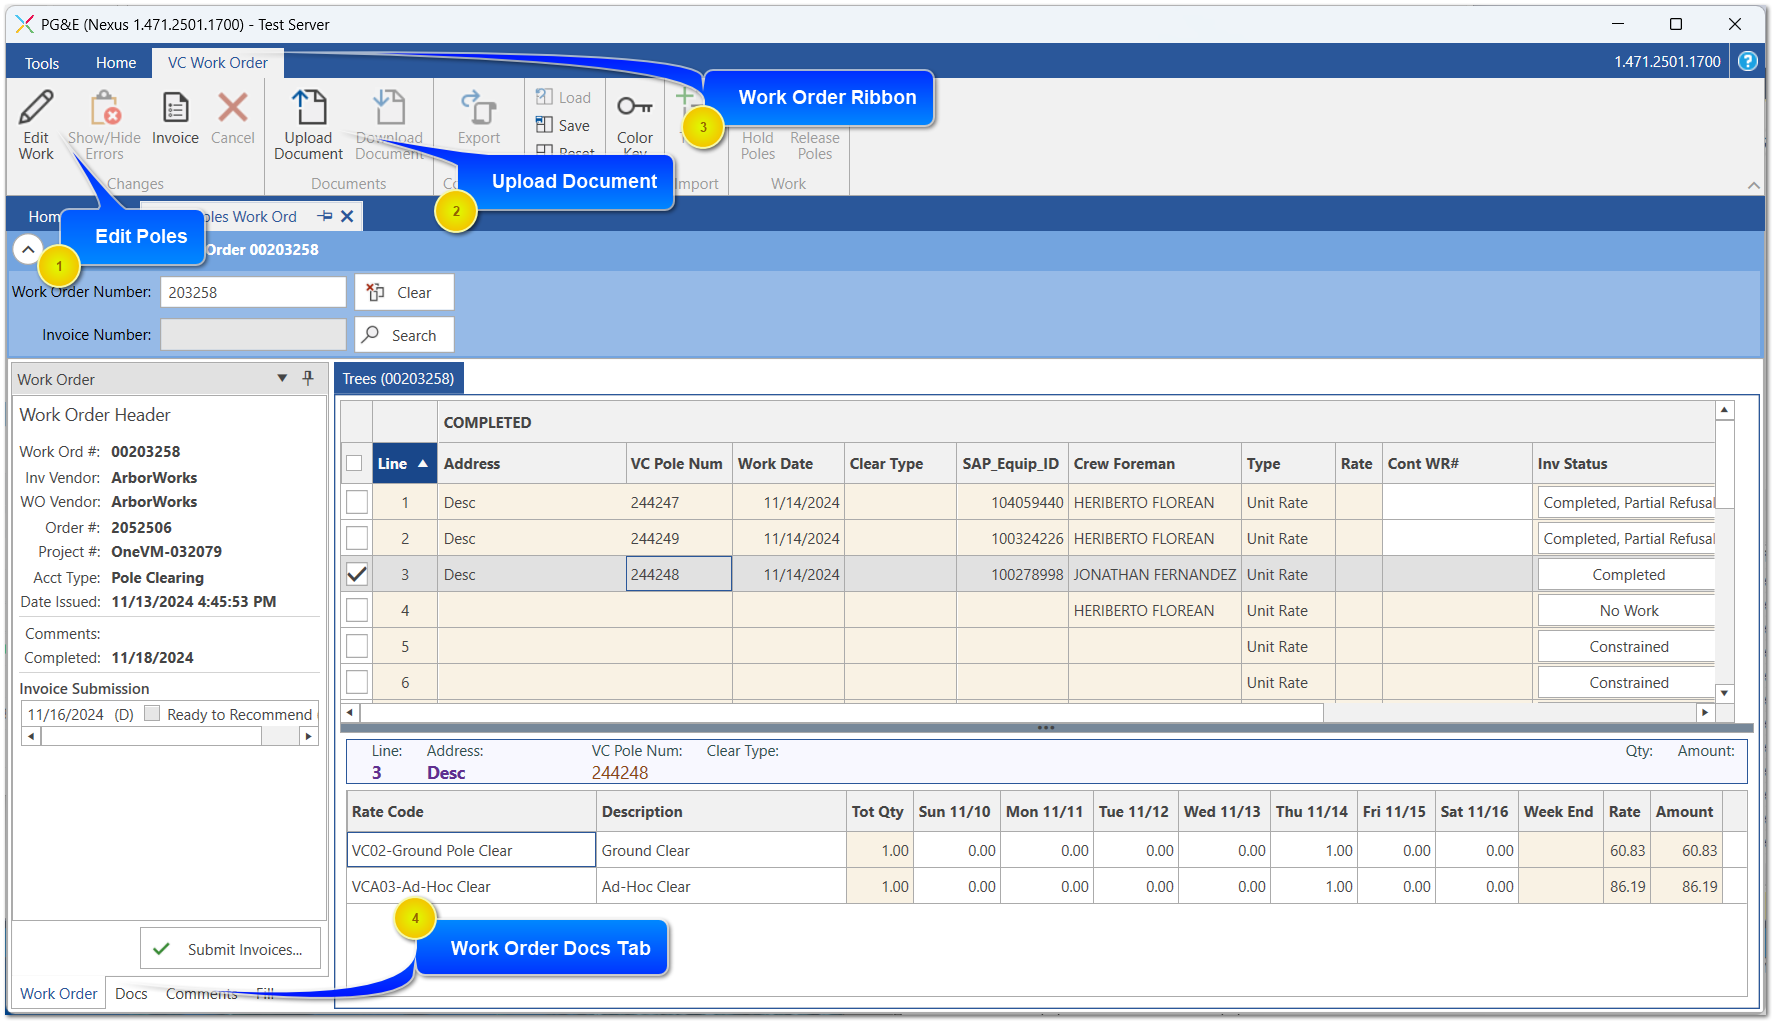
Once a valid work order has been searched for, the user is taken to the Work Order tab and the Work Order Ribbon is displayed.  While most of this form is read only, there are only a couple of options you have when viewing a OneVM VC work order. 
Work Order Ribbon
1

Edit Poles

1. Edit Poles
Add or edit T&M Rate codes on poles with T&M billing type
Edit ContWR field for each invoiced pole
2

Upload Document

2. Upload Document
Select to upload supporting documents for invoice.
3

Work Order Ribbon

3. Work Order Ribbon
Ribbon supporting all controls on work order view and edit
4

Work Order Docs Tab

4. Work Order Docs Tab
Open this tab to upload supporting documents, assuming the review process has not started.
 

Work Order Ribbon

Work Order Ribbon
 
Click the buttons below to jump directly to the page describing that feature.
 
1

Upload Document

1. Upload Document
  Click this to upload supporting documents.  Only some users are allowed to upload documents.
  User will be presented with a file explorer window where they can select the file they wish to upload. See more detail instructions on next pages
2

Download Document

2. Download Document
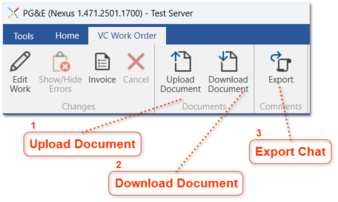
  This allows you to download any files you have previously uploaded to Nexus.  On the Documents tab, select the document you wish to download and click this button
  User will be presented with a file explorer window where they can select where to save the file on their computer.  See more detail instructions on next pages
3

Export Chat

3. Export Chat
  This will allow you to export all comments entered on the active work request to a CSV file on you computer