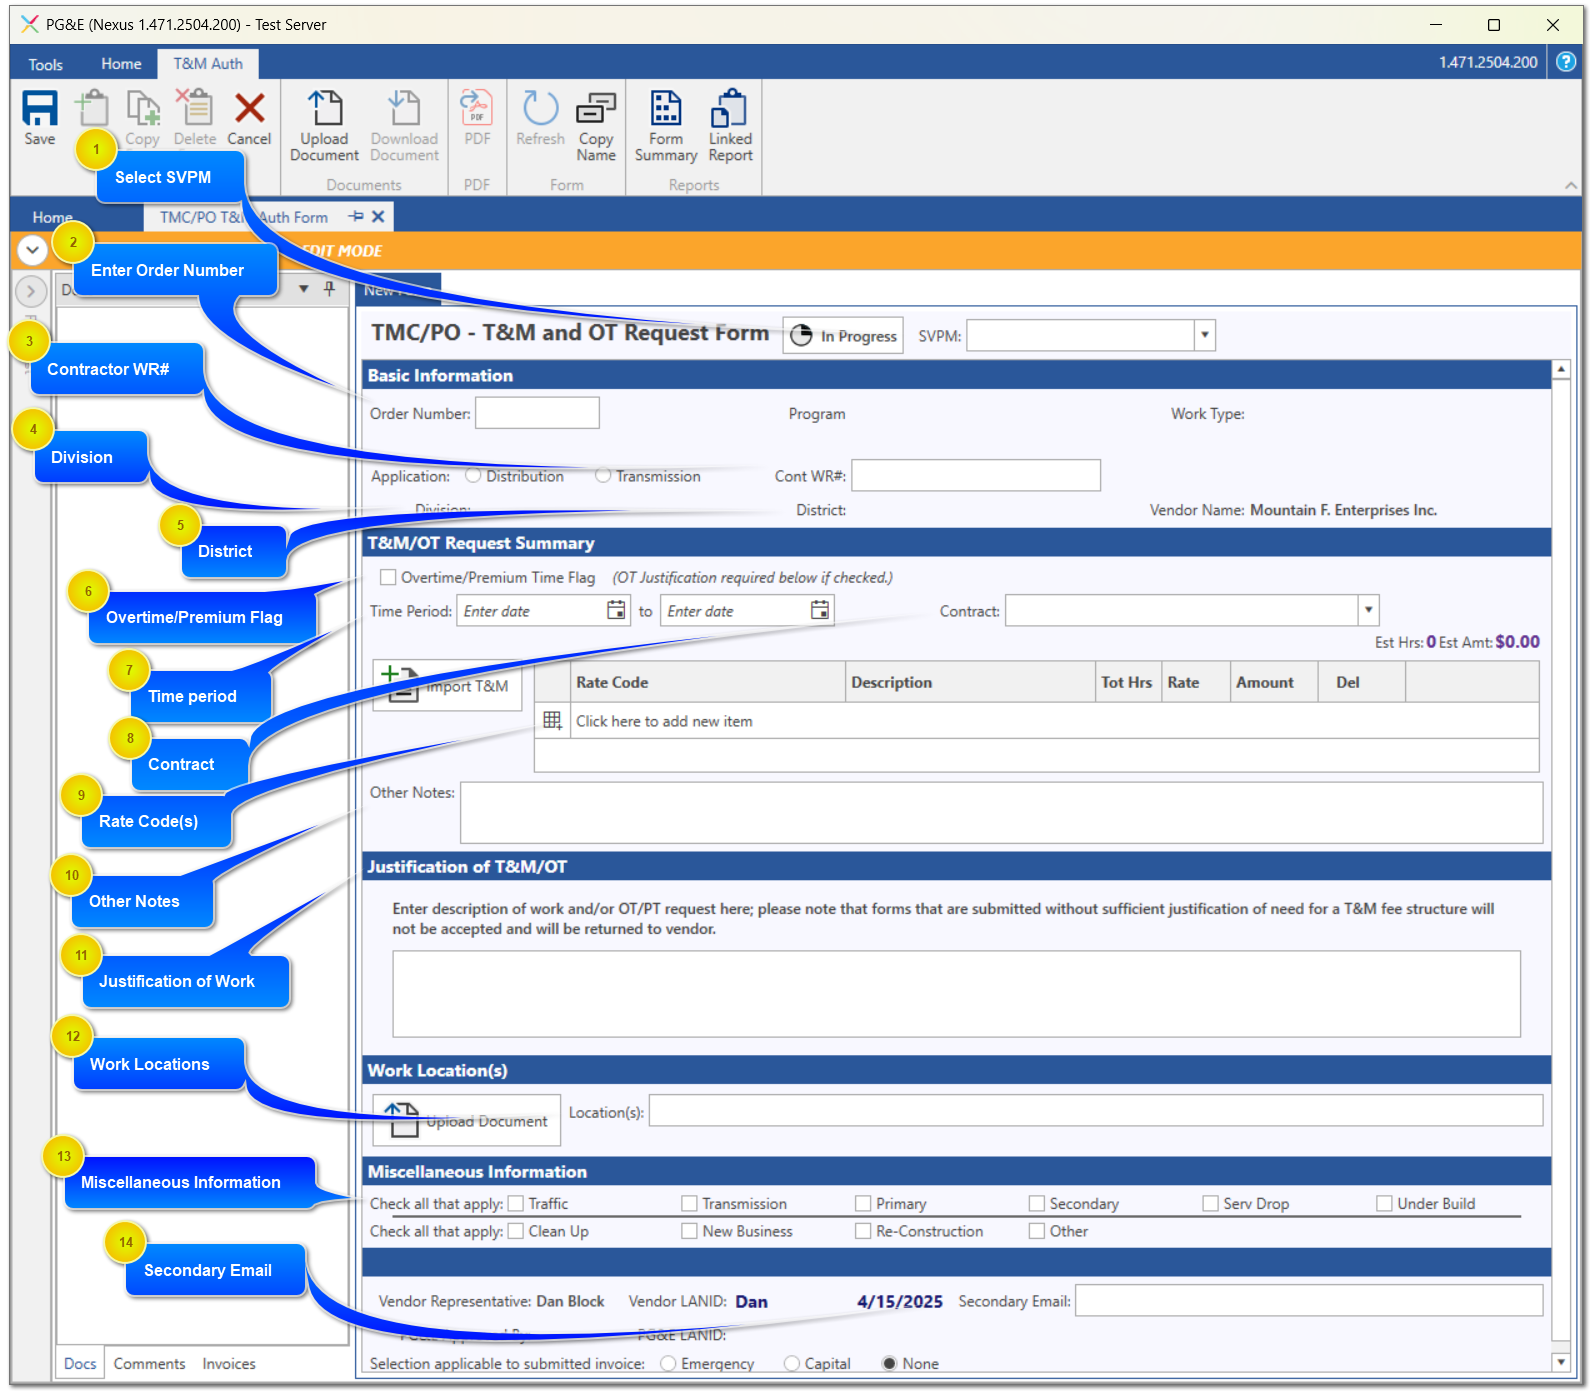
When Add New on the T&M Auth Ribbon is selected you are presented with an empty form to fill out. The orange banner indicates you are in Edit mode. Follow the step by step instructions below to fill out the form. You are only allowed to save the form once all required entries have been made. At this time, "O/P Time checkbox", "Cont WR#", "Other Notes", and "Miscellaneous Information" sections are the only fields not required to be filled in.
When completed, click the Save button. If there are any errors detected on the form, they will be displayed, outlined in red, and the form will not be saved. Correct any missing or incorrect data, and then click Save again.
You can use the Copy Form button to copy another form to create a new form. See View/Edit/Copy_New for more information
Select SVPM
From the pull-down list, select the SVPM that will review and approve this form. Once your form is completed and submitted to PGE, the SVPM will receive and email with a PDF version of the form attached, as well as a link to review and approve the form in VMS
Enter an additional email address where you want a copy of the email sent when you Submit to PGE. The form is emailed to SVPM, and will be copied to email address(es) on this line. You can enter more than one email, but they need to be separated by a semicolon ";" and fit in the 255 character field
A future feature is that back-office will be notifying the user who created the form once the form is approved. Since that person has to be a valid PG&E LANID, the secondary email section can be filled in with a vendor email to also send notice of approvals to. You can enter more than one email, but they need to be separated by a semicolon ";" and fit in the 255 character field
Enter a valid order number for the work being performed. Once selected the Program, Work Type, and Application Type will be auto filled. If the order number is valid in SAP but not found in program lookup table, you will need to manually select the program and Application type. The Work Type will not be applicable if the order# is not found in the program lookup table,
Select the applicable contract from the pull-down list. If no contract is available, verify your Division, District, and time period are valid and don't cross the contract start or end date boundaries
Select rate code (as you do on invoice T&M entries). Enter a description, and total estimated hours required for the rate code. Press Enter to open a new row to add another rate code until finished