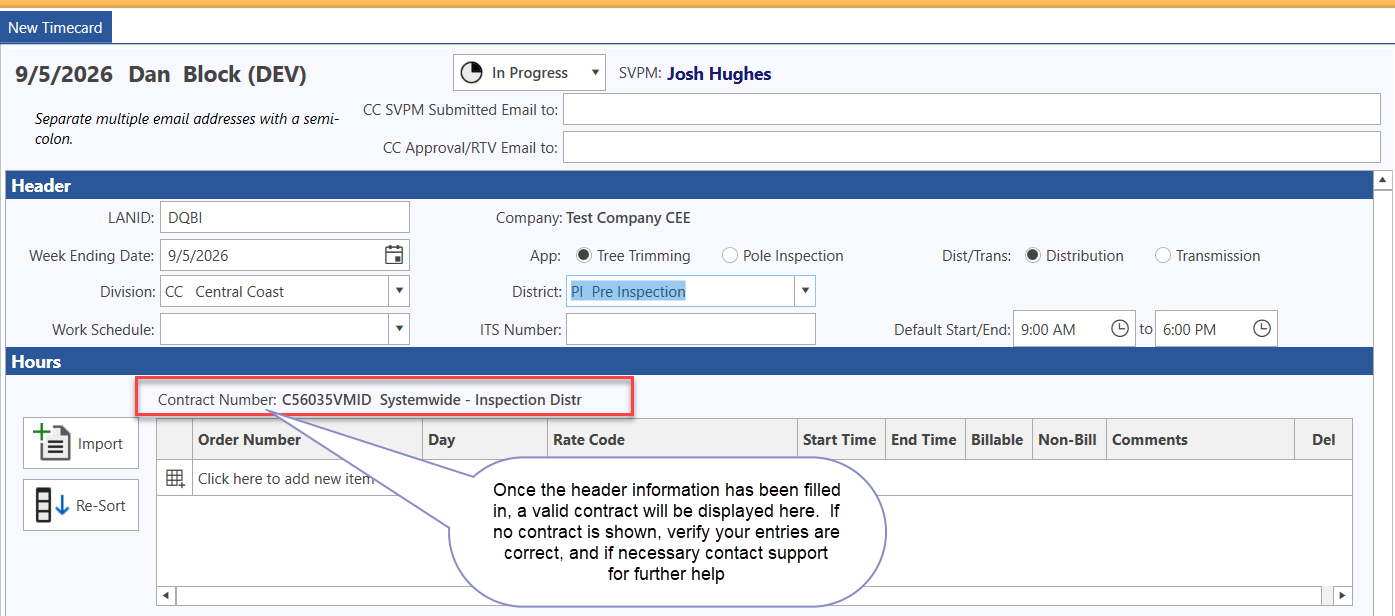
Once the header information has been filled out, a valid contract should be displayed.
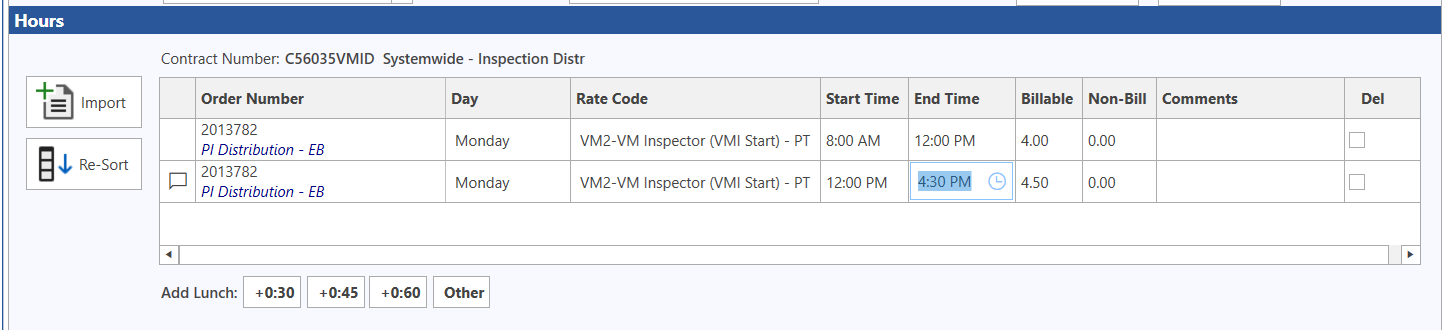
Now enter the hours and rate codes for the week as identified below, Include a lunch break if needed. Here is a simple example:
One the first row, enter an order#, select Monday for the first entry date, select rate code (=VM2 in this example). Start time was auto filled with the 8am start of day, so change the end time to 12pm
A new row is auto added using the same rate code from the line you entered. Simply click the "Add Lunch" button that is applicable to your lunch break. In this example we clicked "+0:30" to add a 30 minute lunch break
The second row is change into a non billable lunch break fro 12:00-12:30.
Now click the "Click here to add new row" to add another time entry
A new rate code row is added, using the last billable rate code entered, using a start time that follows the lunch breake and an end time for the end of the work day
If they are no other entries for Monday you are done with the day. Add a new row, change the day to Tuesday" and repeate entries for the rest of the week
If the order number changes from day to day, or even within the day, simply change the order# for the applicable entry.
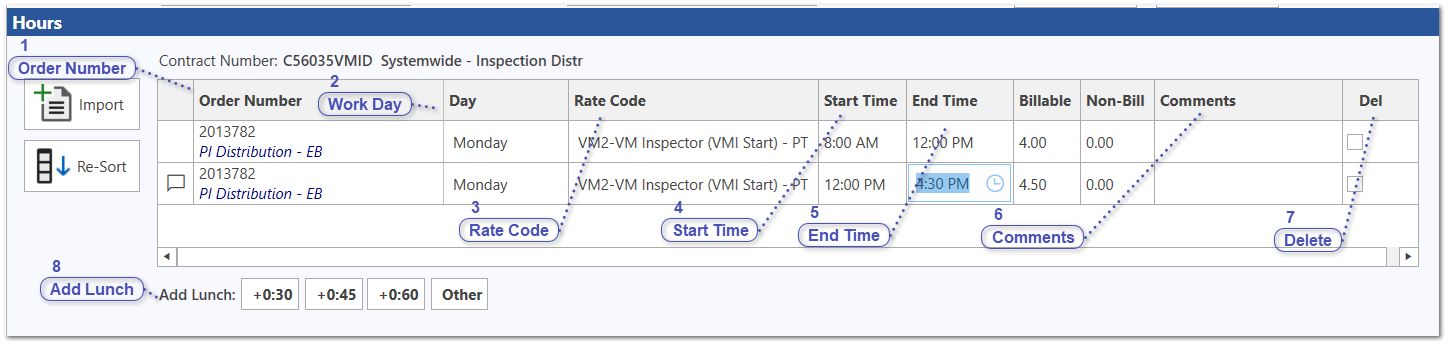
Entry of timecard row fields is shown below:
Order Number
Enter the order number used to bill this timecard to. You can use the wizard to find your order number if not known. See Order Number Wizard for more information on how to us the wizard.
Each day uses the default start and stop times to help you build your timecard. The first time a day has been selected, the Start Time will default to the start time you have in the header record. You can change both the start and end times for each record.
While the end time will default to the end of day based on your header entries, you can change this for actual time worked. For example, if user worked from 8am -12pm and then took a lunch, simply change the end time on the first work record to 12pm, add a lunch, and then continue the next entry after lunch.
If you want to delete a row that was entered by accident, you can check the Del checkbox. The the row had been previously saved, it will be displayed with all row items crossed out and the row will be removed when you save your changes. If the row has not ye been saved it will disappear immediately from screen