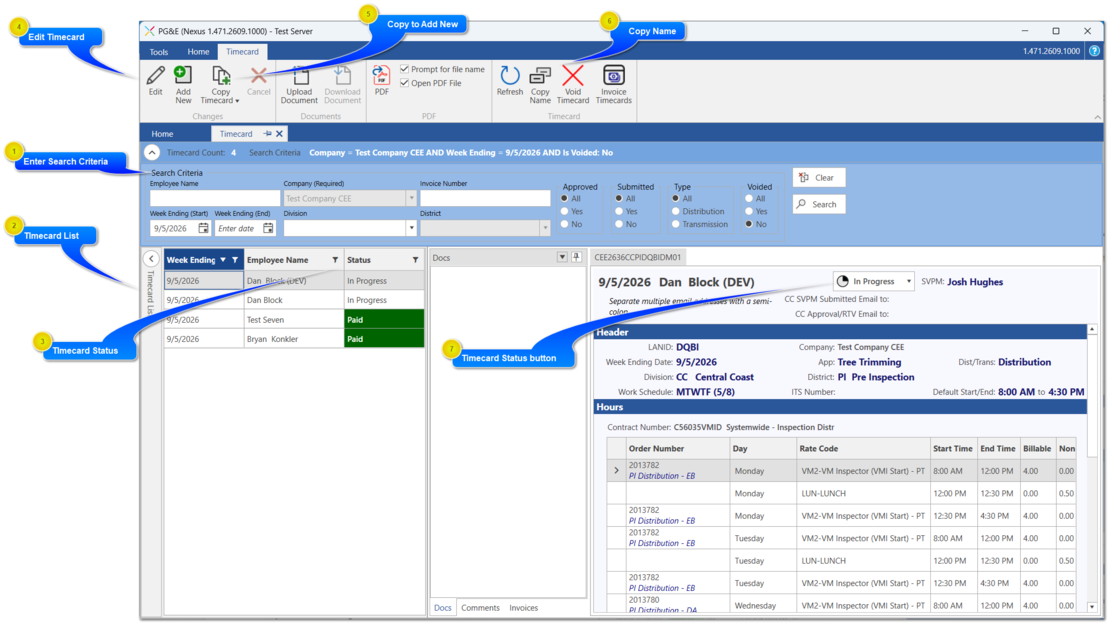
To view and/or edit existing timecard, enter the search criteria to bring up a list of matching timecards, or enter the individual timecard name you wish to view. In the example shown below, user entered a weekending date to find matching timecards. The matching timecards are displayed in the TimecardList on left panel. If only one timecard is matched it will be displayed automatically, otherwise select the timecard in the timecard list that you wish to view. When a timecard is selected, you can upload documents to that timecard, or click the Edit button to make changes to timecards.
TImecards can only be edited or have documents attached if the timecard status is In Progress
See items 4-6 to view how to use the TImecard Ribbon buttons in the Changes & Documents groups
Enter Search Criteria
Enter an individual name, week ending date, or other criteria for the timesheet you want to locate. Once you have entered your desired search criteria, click the Search button to display a list of matching timecards then click the timecard you wish to view. Note that if only one timecard matches your search it will be selected and displayed automatically.
Select timecard from Timecard List to display the timecard information. If the timecard status = "In Progress" then you can add supporting documents, or edit the timecard data.
Valid only for timecards that are still In Progress, click the Edit button to open the selected timecard for edit. Make applicable changes and click Save button to save your changes, or Cancel button to abort your changes.
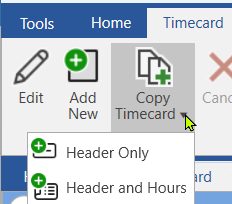
Click this button to start a new timecard by creating a copy of the currently selected timecard. When selecting this button you have the option to copy the header info only, or copy header and daily hour entries as well.
A new timecard will be created where you can modify any of the copied fields to save a new timecard. Attached documents are not copied during this process.
Use this feature to easily create identical, or close to identical timecards for multiple employees during same week ending date; or to create a new timecard for an employee on the next week ending date. How you use it is up to you
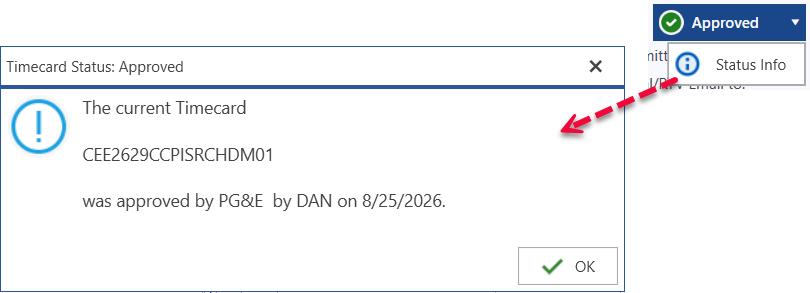
The status button will display the status of each timecard being viewed/edited. Clicking the status button will display information about who is responsible for the status, and when the status was applied. Click the status button to pull down a choice of a history grid of all status dates and user IDs, as well as an option to view the form's log.


 TImecards can only be edited or have documents attached if the timecard status is